January 7, 2009
Cleverness, Projects
21 Comments
In this previous post I disassembled the Coby DP-151SX digital picture frame. This device is very hackable, and includes a lot of goodies such as a Li-Ion battery and battery charger circuit as well as a neat little color LCD display with a white LED backlight. The pinout for the LCD is in the previous post.
The MAXQ2000 microcontroller development board I have uses a 0.1″ spacing header to connect to the I/O pins, so I made a little adapter and wired it up to the LCD connector using wire-wrap wire. It uses 13 I/O lines, but that could be reduced 11 if CS# is wired to ground and RST# tied to a separate reset IC (such as a MAX811). It’s actually a good idea to use CS#, because you can then multiplex the functionality of all the other pins and recover that I/O.
Here is a picture showing the LCD up and running with a simple test pattern:
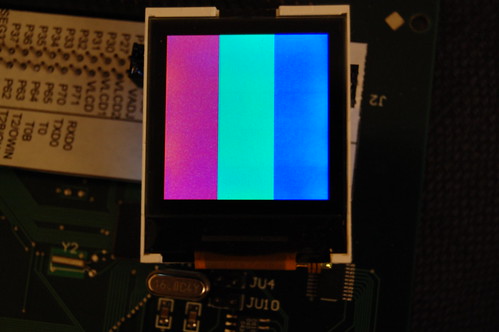
It’s not 128×128, but actually 132×132 pixels. The color depth is 16-bit using a fairly standard 5-6-5 bit encoding. See the PCF8833 datasheet for more details.
Spark Fun has a similar LCD display which uses the same controller, only it costs $20. Amazon.com sells the Coby-151SX in black for $10. Not a bad deal: for $10 less you get a Li-Ion battery, mini-USB cable, and a driver CD, which you could use as a coaster for your Mountain Dew to help with the LCD programming. Spark Fun has some sample code which you should easily be able to adapt for parallel mode (since the Coby LCD connector brings out the parallel data lines, unlike the Spark Fun LCD).
The source code for my test program will get posted once I clean it up and possibly add functionality (Character fonts? Bit blitters?)
January 3, 2009
Projects
1 Comment
Recently I obtained two Coby DP-151SX digital photo keychains to see if it is possible to hack the device. The answer is yes. These devices can be purchased for as low as $9, and I thought they might make a good source of color LCD displays. There is a project to hack small photoframe devices such as these, and they have already developed some tools to hack the firmware and display dynamic images (such as an MP3 player status screen) using the USB connector on the device. The Wiki at the previous link is a good resource.
Below is a photo of the disassembled device. Click the photo to see the Flickr notes annotating different parts of the device.

The specs of the device are as follows:
- LCD: Varitronix COG-C147MVGA, 128×128, chip-on-glass (COG) integrated controller with white LED backlight.
- CPU: Possibly the ST2203U 65C02-compatible device with built-in USB engine.
- FLASH: Spansion S29AL008 1Mx8 NAND FLASH memory.
- Battery: 180mAh 3.7V lithium ion rechargeable.
The ST2203U uses a 65C02 processor core with several peripherals: a DMA engine, FLASH memory controller, real-time clock, LCD controller (not used in the Coby device), and a USB engine. It has an onboard mask ROM, but this appears to be disabled on the Coby device. Since resistor R12 is jumpered with a zero-ohm resistor, the ST2203U boots from the external memory. If R13 was jumpered instead, then the device would boot from the internal memory. Apparently the program that comes with the Coby device has the ability to download new firmware through USB. I’m tempted to write my own firmware for this creature, but the lack of an ICE along with a decent toolchain has deterred me.
The device has a built-in battery charger. I have not yet attempted to reverse engineer it yet. The lack of inductors makes me think it’s a linear charge circuit.
The most interesting part, at least to me, is the LCD screen. It has a built-in controller which appears to be similar to or compatible with the PCF8833. Varitronix, of course, does not provide data on this particular LCD display. Based on a little reverse engineering (since many of the control lines are shared with the memory chip) I was able to figure out a pinout:
- VCC (3.0V, but it probably works at 3.3V too)
- GND
- Unknown. Connected to the COG IC but is not driven as an output. This may be the OTP programming control pin.
- NC (but can be connected to the COG IC with a jumper on the flex cable, J1)
- CS# (Chip Select)
- D/C# (Data/Command)
- RD# (Read)
- WR# (Write)
- RST#
- D0
- NC
- D1
- NC
- D2
- NC
- D3
- NC
- D4
- NC
- D5
- NC
- D6
- NC
- D7
- NC
- LED Cathode
- LED Anode
The next step is to detach the LCD and wire it up to a breakout board. Then I can connect the breakout board to a microcontroller and attempt to communicate with it.
