Steampunk Timekeeping Instrument
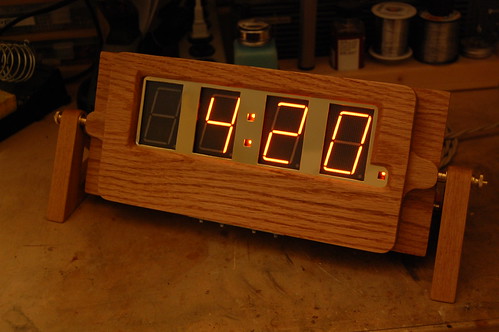
February 8, 2009 Projects No CommentsHere’s a recent product of my workshop. A week of sawing wood, drilling, carving with my Dremel, slicing brass with tin snips, polishing, sanding, and staining resulted in this brand new limited edition (of one) Steampunk timekeeping instrument.

This device is based on the Panaplex clock circuit I built a while back. The displays are seven segment but, like Nixie tubes, are filled with Neon gas. To match them, the colon and PM indicator use small neon lamps.
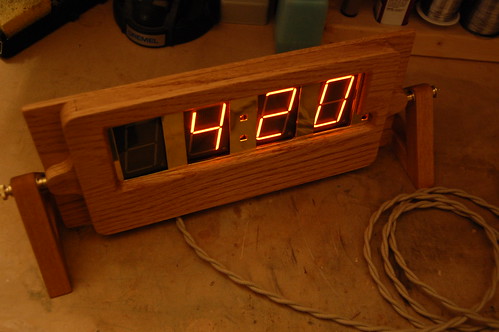
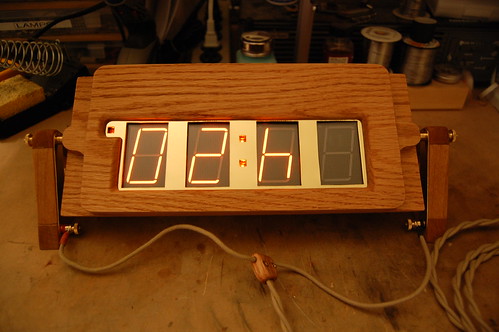
Construction is stained oak with brass fittings. The device is exactly one inch thick. It can pivot about the two knurled brass nuts on either end.

But how does power enter this timekeeping device? It travels through brass terminals (with appropriately colored washers to indicate the polarity) up to the pivot, where it enters the case of the timepiece. Look on the inside edges of the wooden stands, and you will see the polished brass strips that carry the direct current up to the knurled nuts from the terminals.

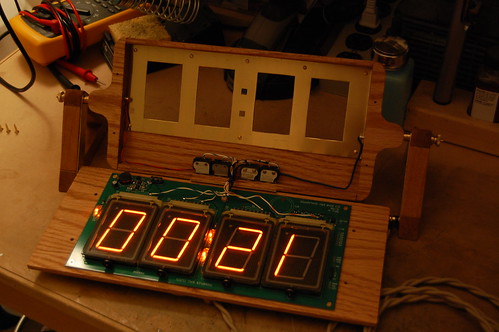
Now for the technical details. The timepiece uses a PIC18F242 running at 4MHz. The time is kept by an exceptionally tiny sliver of quartz imbedded within a miniature silver cylinder–a 32KHz watch crystal. My standard 180V power supply provides the high voltage needed by the Panaplex display elements. Here is the timekeeping instrument with the two halves of the case separated.

My other designs are usually drawn out in AutoCAD, but this time I decided to use the old fashioned method. The two triangular wooden stands on the end took some tricky geometry. The pivot is exactly 3″ up from the lower edge of the base. The angle of the triangle is 70 degrees, because 60 didn’t look right and 80-90 was too peaky looking.
The switches I found at HSC Electronic’s yearly sale. I like to use unusual looking switches and controls in my projects. I feel very sad when I see someone’s awesome project that has been defiled by cheap-looking Radio Shack switches.
The Steampunk timekeeping device was made using a simple setup of a junior hacksaw (6″ long), an old cordless drill, a Dremel, a Dremel drill press, and numerous small hand tools. Most of the work happened on the back patio of my apartment. Yes, it’s possible to be a Maker even in the big city.
