Antique Fan Restoration
July 31, 2008 9:24 pm RestorationAt the De Anza Electronics Flea Market, someone was selling a rather beat-up and rusty desk fan. But it was no ordinary desk fan, this one was quite old. I had to have it. Later on, it looked at me plaintively from my workbench.
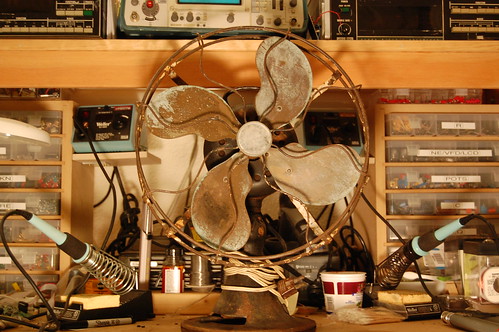
Suddenly it hit me–I had to restore this bedraggled-looking thing!
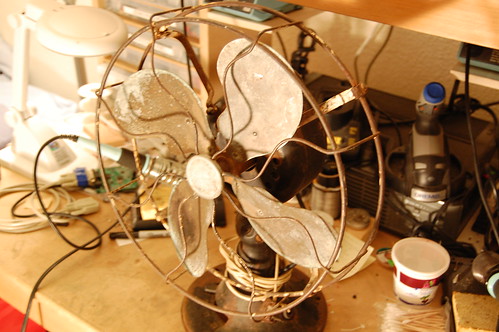
It was a really long and involved process, taking me well over a month, but I have finally (mostly) finished. Why did it take so long? Well, for example, I found that the speed coil (basically a big inductor with taps for each speed setting) was slowly being eaten by rust. Thus began the arduous process of disassembling the entire coil, pulling apart the laminations, polishing off all the rust, varnishing them again (since the laminations must be insulated from each other), and reassembling the whole thing.
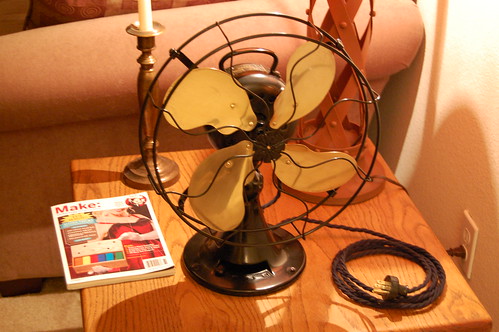
All the work really did pay off. Here is what the mostly completed fan looks like. It’s fully operational. The cotton-covered twisted line cord I purchased from Sundial Wire. The plug is actually a standard item at OSH, believe it or not. I guess styles don’t really change much. The cord the fan came with was a more modern zip cord with a quick-plug, and the replacement plug is basically a 3-prong copy of the original.
Why “mostly?” Well, the badge that goes in the center of the cage is pretty much beyond repair, and it also appears to be the wrong badge for this fan.
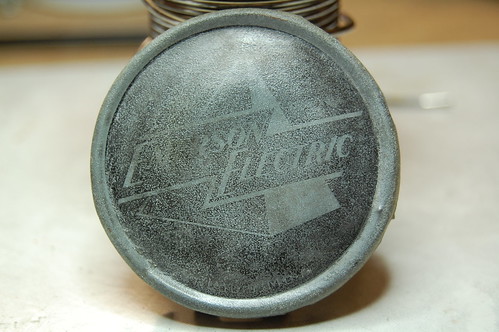
The badge should be brass with a slightly different logo. Regardless of whether or not this badge is original, brass would look a whole lot better. I have been trying (and failing at) various brass etching techniques, since I have the CAD drawing of the logo already.
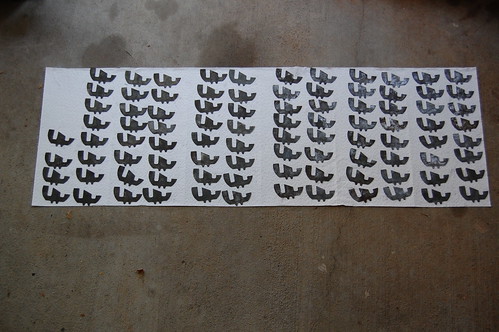
Problem #1 is getting the toner transfer method to work. I have used magazine paper (an old issue of Nuts and Volts: my Make magazine issues deserve better!) and it really does not work for me, probably due to the amount of toner my laser printer puts out. Trust me, I tried a dozen times or so.
Problem #2 is the actual etching process. Salt tank etching was a bit too faint, so next time I will try ferric chloride, which is usually used for PC boards, but should work for brass as well.
Problem #3 is getting the etched brass sheet into the proper shape, which is convex in the middle with a rounded rim. Metal tabs in the back fold around the disc in the center of the cage to hold the badge in place.
If you have any ideas, drop me a line in the comments…

Clyde :
Date: September 7, 2008 @ 12:38 pm
You did a wonderful restoration – the fan looks great. I have a question I hope you can help me with.
How do I get the blade assembly off the motor shaft I dont see any set screws and am afraid to muck it up. Is it screwed on and if so how do I keep the motor from turning to unscrew it ? Thank You and I like your idea regarding the switch lever I noticed the “hot” issue while taking it apart – great solution.
Thank You
Clyde
eric :
Date: September 7, 2008 @ 11:17 pm
Thank you.
The fan blade hub (spider) is screwed onto the motor shaft with left-handed threads. The usual thing is to stick something like an Allen wrench into a hole on the back of the motor and get it to “grip” onto the rotor. Watch out that you don’t accidentally damage the windings, so use a flashlight to see where you’re putting the end of the Allen wrench.
Often the rotor will have a blind hole drilled into it for balancing purposes; if you can get the Allen wrench to catch the hole enough to hold the rotor still, then you can turn the fan blades clockwise to unscrew them. Be careful when you do it so you won’t bend the blades.
My fan’s screw threads were badly seized, and I had to spray some penetrating oil into the front of the motor to help loosen up the threads. Even that wasn’t quite enough and I ended up using a heat gun on the spider to make it expand and break free from the rotor.
Tube Time » Blog Archive » A New Fan :
Date: November 8, 2008 @ 12:19 pm
[…] except for the date of manufacture. This fan is in reasonably good condition, compared to the Emerson that I restored before. There is very little rust which makes the restoration job much, much easier. Leave a […]
David B. Wolf :
Date: March 30, 2009 @ 7:28 pm
Last weekend I secured an Emerson fan, a somewhat later model than yours. I have begun to restore it, and have only one problem that has me stumped. The motor spins fine when the switch is in the #1 position. It does not receive power in the #2 or #3 position, though one can hear a faint buzz and feel a minor vibration in those positions. Any suggestions?
David B. Wolf
eric :
Date: April 5, 2009 @ 9:57 pm
Hard to say. Various models of Emerson fans are wired differently. I’d take it apart and check the resistance of the choke coil (if it has one).
You’d have better luck asking the question at the AFCA forum.
john m :
Date: February 25, 2010 @ 8:01 pm
how did you restore the brass blades?
Andy :
Date: August 23, 2012 @ 10:38 am
Where does one get a 3-prong plug like that? What is OSH?
eric :
Date: September 16, 2012 @ 4:18 pm
OSH stands for Orchard Supply Hardware, which is a fairly widespread chain of hardware stores out here in California.