November 8, 2008
Restoration
1 Comment
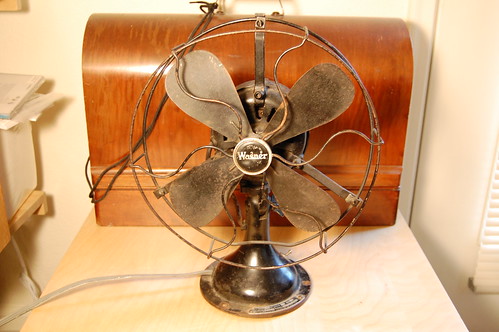
My Wagner fan restoration has progressed well (see previous posts). Recently I finished the final assembly. I took the entire fan apart and cleaned every part. Many of the parts needed to be repainted, and the fan blade needed to be stripped of the paint and polished.
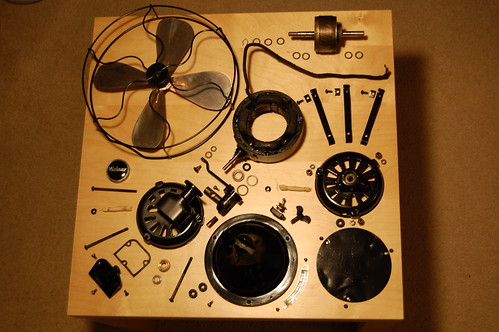
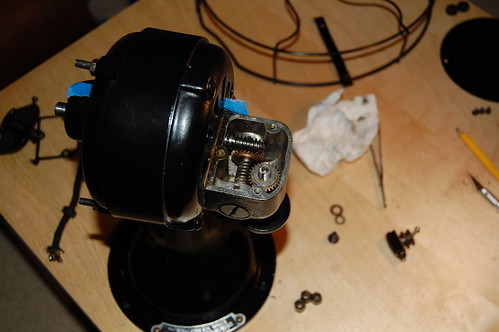
Here are all the pieces laid out. Please click on the photo for detailed Flickr annotations. brittnybadger has taken some really great photos of household appliances in similar “poses.” I wish my photo was as good as one of hers.
The oscillator gearbox looks really interesting. Here it is before I added gearbox grease. It takes the high speed rotation of the fan motor and slows it down using two worm gears, and then drives the crank which rotates the fan from side to side.
There is still some work left to be done. The fan blade is made of steel which was copper plated before being painted. Time has not been kind to the plating. When I stripped the paint, I could see green corrosion and pitting that ruined the plating, so I had little choice but to polish off the rest of the copper plating. I have not yet decided whether to leave the blade steel or to get it copper plated again. Regardless of that I like the look of an unpainted blade.
The headwire which connects the fan motor to the base and the switch also needs to be replaced. The rubber insulation underneath the cloth has gotten brittle and cracked. Similarly, the line cord is not original and I need to do some more research to find out what an original line cord looks like.
Finally, I need to make some safety upgrades. I have already added a fuse in the base that will prevent shorts in the motor windings from causing a fire. I still need to add a grounding wire since the case is metal and could shock people if one of the motor windings touches it.
November 8, 2008
Restoration
No Comments
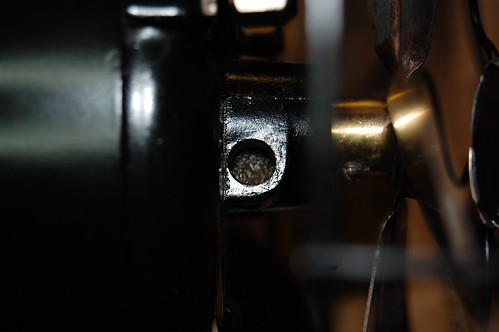
During the restoration process of my antique Wagner fan, I found that the bearings are a lot different than the Emerson 28646 I restored. This particular fan has a bearing on the front and one on the rear of the motor housing, and each bearing has an oil sump, some small holes to allow the oil leaking from the front and rear of the bearing to trickle down into the sump, and a wool wick that uses capillary action to “pump” oil out of the sump and bring it back up onto the bearing surface. Here’s a picture that shows how it all works:
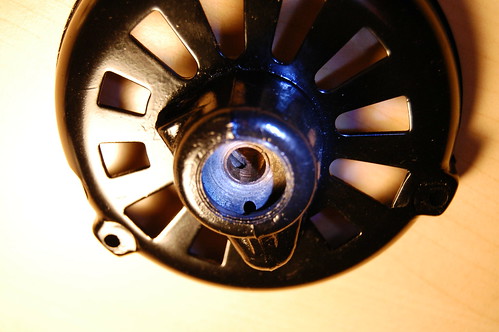
In the picture, the oil sump is the lump protruding from the bottom of the round bearing housing. You can see the small hole that allows oil to drain back into the sump. On the inside of the bearing, there is an ovoid hole that lets the wool wick contact the rotating shaft and apply oil sucked up from the sump. You can click on the picture to see the Flickr annotations. Here is what the wool wick looks like:
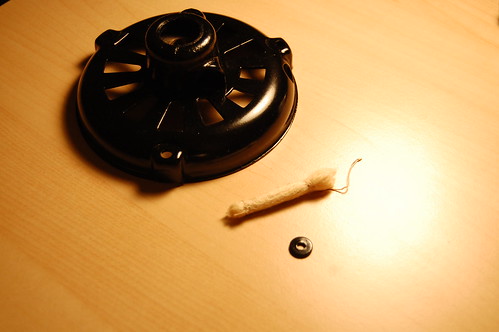
The small round washer acts as a plug to keep the wool wick inside the bearing, and the hole is where you add oil. The wick itself is made of several strands of worsted wool yarn that have been tied with string. Originally this was a black lump of grease when I first pulled it out of the bearing, but I was able to clean it up by soaking it in laundry detergent. A greasy oil wick prevents it from working, and my Wagner’s front bearing was bone dry when I first took it apart. If you’re doing a restoration and you need to replace the wick, you must use real wool. Synthetic fibers apparently do not have same degree of capillary action. Wool wicking is also the material of choice for steam locomotive bearings.
The wick fits in the hole on the top of the bearing.
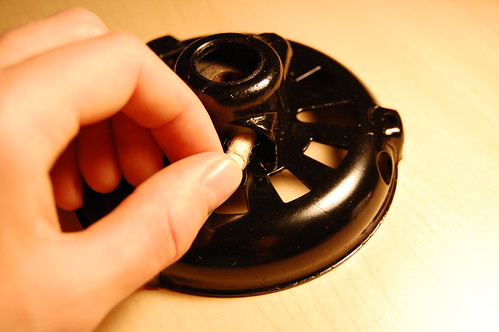
Here is a photo showing the assembled bearing (minus the washer).
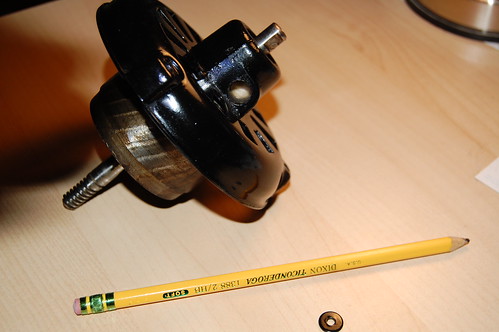
I used a pencil to pack the wick into the bearing. It is now ready for oiling. I am using the 3-in-1 SAE 20 oil that is meant specifically for motors. It does not smell so strongly as the multipurpose 3-in-1 oil. In this picture below, you can see the wick soaked with oil on the fan after final assembly:
Add oil about 10 drops at a time and allow it to soak in for an hour. Do this again until the part of the wick you can see is saturated. If you add too much oil then it could spill out of the top, so you don’t want to add more oil than the wick can hold. It’s important to make sure the wick never goes dry so that your bearing will always be properly oiled.