Bernoulli Box Fun

Restoration No Comments

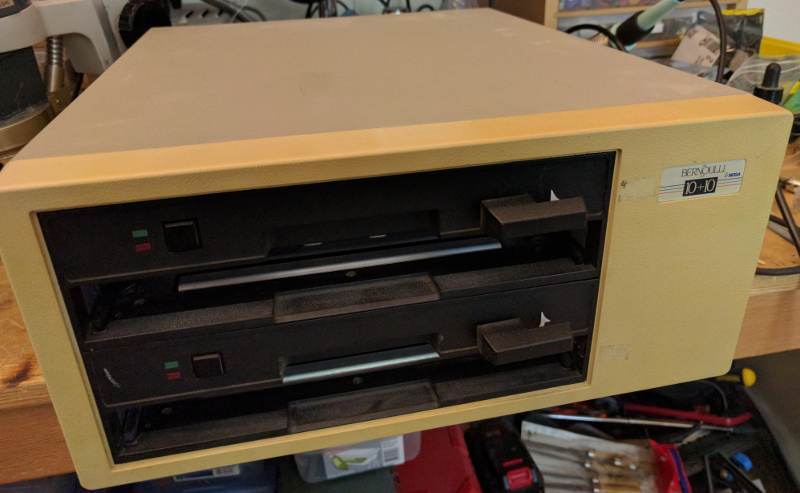
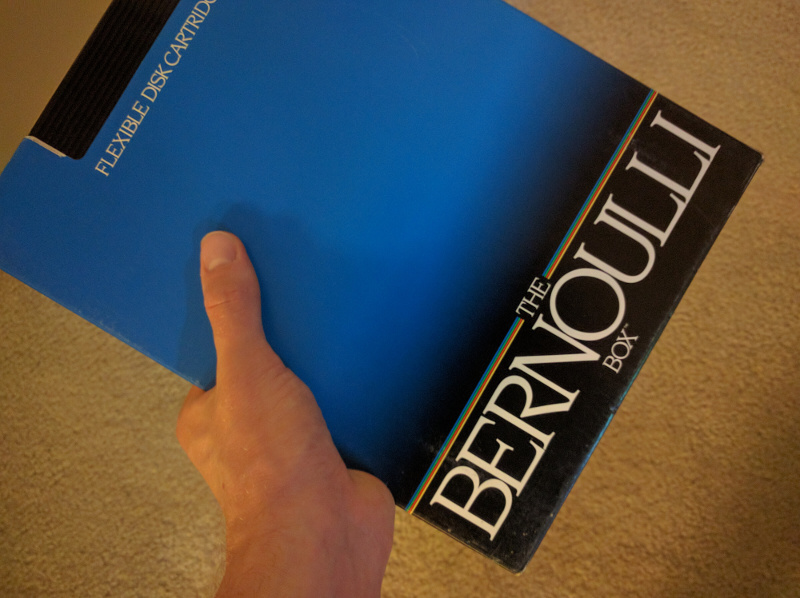
I’ve got an old Bernoulli Box (Model A210H). In the early ’80s, it was a popular way to store 10 megabytes of data in a removable cartridge format. This was also a very common IBM PC hard drive capacity back in those days, so it was great for backups. The cartridge is quite large, and comes in a protective cardboard box:

IMG_20160705_223201

It’s been 20 years since I last turned it on. After plugging it in and flipping the switch, I smelled smoke so I quickly shut it off. I opened it up (6 screws) and removed a drive (4 screws) and pulled the controller card off of it (4 more screws). Then I noticed a blown tantalum capacitor, so I replaced it. Then I put it all back together again and powered it up with a bench supply (tantalum capacitors nearly always fail in a short circuit which makes things a little too exciting, so at least a bench supply lets me limit the current). More smoke, and another blown tantalum capacitor. I fixed it and put it back together, and powered it up with the regular power supply.

Closing the drive door made the motor spin up very sluggishly, so I checked and noticed the supply voltages were low. So I took apart the power supply and noticed a voltage adjustment potentiometer, so I set it back to the correct voltages and put everything back together. Now the motors seemed to run OK.

IMG_20160707_103902

I tried putting in a disk and closing the door, but the drive made horrible noises. The LED on the drive blinked and the drive spun down, essentially rejecting the disk. I figured out how to open the protective window on the disk cartridge, and noticed that there were bits of sticky crap on the disk, mostly near the hub in the center. Taking apart the drive, I noticed a rubber ring that is supposed to push down on the disk in order to create some friction to spin it up. The rubber had decomposed into sticky stuff that was getting everywhere.

Bernoulli drives work on the Bernoulli principle. The disk itself is basically a floppy disk and is made from thin flexible plastic. There is a metal plate (the Bernoulli plate) that the disk spins up against. As it spins, the air in between the disk and the plate also spins and flies out due to centrifugal force. This creates a vacuum that pulls the disk very close to the plate, stiffening it so much that it acts like a hard disk platter. The drive head floats on an air cushion above the disk surface just like in a hard drive.

Unlike in a hard drive, if any dust particles get pulled into the gap, then the disk drops away from the head and nothing is damaged. The metal plate and the head both need to be very, very clean for the drive to work correctly. They are actually mounted upside down so that dust will fall away and not settle. A large fan on the back of the drive (with an attached air filter) provides positive air pressure in the case to help keep dust out. Before it enters the gap between the plate and the disk, the air is filtered a second time by a very small filter located behind the drive head.

In my drive, the head was filthy, the Bernoulli plate had some dust on it, and had a little oxidation on the back. I removed the oxidation with a file, with the idea that any patches of oxidation could produce problematic dust particles. I cleaned the working surface of the plate and the drive head with special no-lint wipes and 91% isopropyl alcohol. It’s very important not to disturb or distort the working surface, otherwise the disks will not spin right and could be damaged.

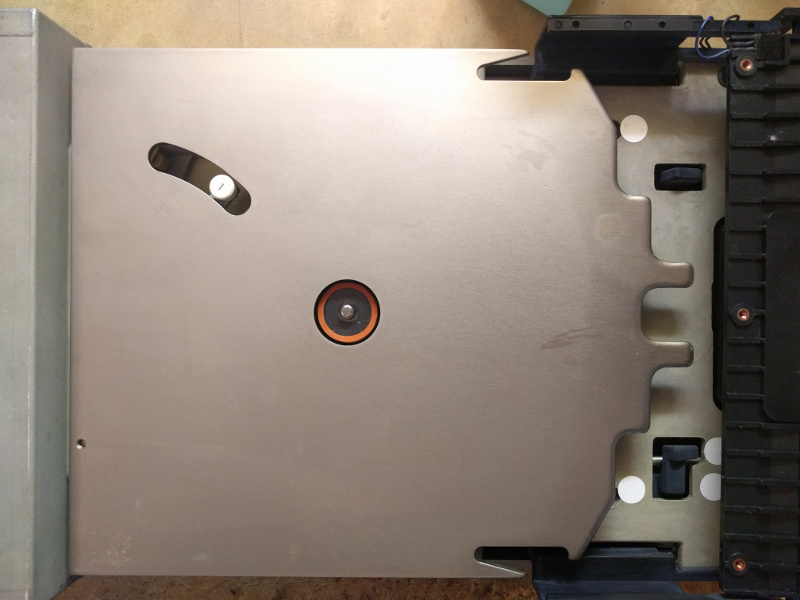
I also fabricated a replacement rubber ring and glued it onto the top of the drive spindle. In the photo below you can see the spindle with the new rubber ring. The drive head is the white thing running in the slot on the upper left. The cartridge enters from the right, and you can see some angular protrusions on the plate that open the cartridge and slide back the protective cover.

IMG_20160706_173947

Fortunately I still had the controller card and the cable, but I had no driver software. I managed to find the DOS driver on some random website, and it actually matched up and worked! I tried it with a different disk and I was able to read back data. A few data errors occurred, but they were mostly soft errors that a couple of retries could fix. I was also able to clean up the original disk using more wipes and isopropyl alcohol. It worked fine although it had some bad sectors.

1948 Philco 48-225 Table Radio

Restoration 3 Comments

Recently I completed restoring a Philco 48-225 AM tube radio. This radio was produced by Philco in 1948, and it was one of the first radio models to have a plastic (polystyrene) case instead of a bakelite case.

When I received the radio, the case was pretty scratched and banged up, and there was a big crack on the left side. Inside was a lot of dust and bits of dried leaves. Most of the tubes were missing, and the ones that came with it were the wrong type.

The case cleaned up nicely after a lot of wet sanding with fine-grit sandpaper and polishing with Novus 1, 2, and 3. The gold paint on the speaker grill was flaking off, but I decided to leave it alone. I saw a photo of the same model radio on eBay and someone had ruined the grill by trying to polish it–the gold paint is a very thin layer and it came off in patches.

Using superglue I fixed the crack and sanded it so that it’s barely visible. I hear you can also use a solvent-type glue, but I didn’t have any. The superglue repair is probably fragile so I will have to be gentle.

Philco 48-225 - Standing Proud
Turning the radio around, you can see the “All-American Five” tube complement. They are the 7A8 converter, the 14A7 IF amplifier, the 14B6 2nd detector/1st audio AVC, the 50L6GT audio output amplifier, and the 35Z5GT rectifier. All the tubes except for the 35Z5GT are of the Loctal variety. Unfortunately the back cover of the radio is missing.
Philco 48-225 - Glows Inside
Here is the underside of the chassis before I restored it. You can see how the paper capacitors are coming apart due to age. These radios were designed to be very low cost and were not supposed to last a very long time. The sectional electrolytic capacitor (the long pale tube on the upper right) in particular did not work at all because the electrolyte had seeped out completely.
Philco 48-225 - Innards
I ended up replacing most of the capacitors. For this restoration I pushed the guts out of each capacitor and slipped the new capacitor inside the old one, sealing the ends with wax. This keeps the underside looking authentic.
Notice that there is no power transformer inside this radio. This radio operates directly off the AC line. The filaments for all 5 tubes are wired in series and the voltage ratings add up to the line voltage. The chassis itself is not grounded and it is actually part of the antenna circuit. There is a 150K resistor connecting it to one side of the AC line. The plug is not polarized so it’s quite easy to shock yourself on any exposed metal. It’s not a good idea to plug it straight into a wall socket because of this. If you try to add a 3 conductor line cord with the ground prong connected to the chassis, this will short out the radio’s antenna and the radio won’t work.

The solution is to use an isolation transformer. I have one connected to a Variac that I use to adjust the line voltage. When I first powered up the radio, I ramped the voltage up slowly to make sure there were no problems along the way. I also measured the line voltage and set it to 115V instead of 120V. AC line voltage was a little lower back in 1948. The difference doesn’t sound like much but running at the higher voltage would apply 6.6V to a tube filament rated at 6.3V. This is enough to reduce the life of the tube.
Variac and Isolation Transformer
With the radio plugged in to the isolation transformer, the radio “floats” relative to the AC line, and it’s safer to touch exposed metal. It’s still a high voltage circuit so the one-hand rule applies. When the radio is isolated like this, it’s also safe to connect it to pieces of test equipment, such as an oscilloscope. The oscilloscope probe ground actually connects to the ground pin on the oscilloscope’s line cord, so if I had tried to test the radio when it was plugged straight in, I could have caused a short circuit that would have melted my scope probe.

It sounds pretty good now and it adds a vintage touch to the living room decor.

Philco 48-225 - Fully Restored

Wagner Antique Fan Assembly

Restoration 1 Comment

My Wagner fan restoration has progressed well (see previous posts). Recently I finished the final assembly. I took the entire fan apart and cleaned every part. Many of the parts needed to be repainted, and the fan blade needed to be stripped of the paint and polished.

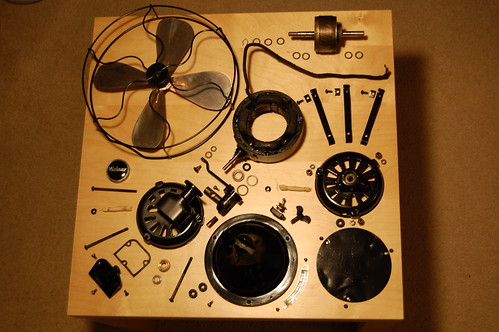
Here are all the pieces laid out. Please click on the photo for detailed Flickr annotations. brittnybadger has taken some really great photos of household appliances in similar “poses.” I wish my photo was as good as one of hers.
Wagner Fan in Pieces

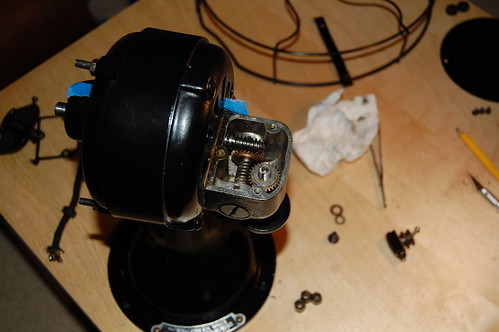
The oscillator gearbox looks really interesting. Here it is before I added gearbox grease. It takes the high speed rotation of the fan motor and slows it down using two worm gears, and then drives the crank which rotates the fan from side to side.
Wagner Fan - Open Gearbox

There is still some work left to be done. The fan blade is made of steel which was copper plated before being painted. Time has not been kind to the plating. When I stripped the paint, I could see green corrosion and pitting that ruined the plating, so I had little choice but to polish off the rest of the copper plating. I have not yet decided whether to leave the blade steel or to get it copper plated again. Regardless of that I like the look of an unpainted blade.

The headwire which connects the fan motor to the base and the switch also needs to be replaced. The rubber insulation underneath the cloth has gotten brittle and cracked. Similarly, the line cord is not original and I need to do some more research to find out what an original line cord looks like.

Finally, I need to make some safety upgrades. I have already added a fuse in the base that will prevent shorts in the motor windings from causing a fire. I still need to add a grounding wire since the case is metal and could shock people if one of the motor windings touches it.

Antique Fan Bearings

Restoration No Comments

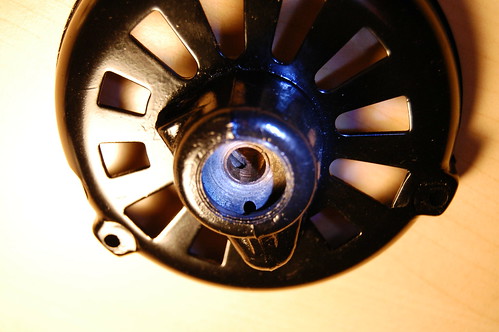
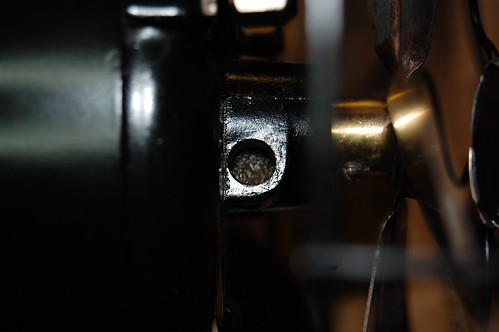
During the restoration process of my antique Wagner fan, I found that the bearings are a lot different than the Emerson 28646 I restored. This particular fan has a bearing on the front and one on the rear of the motor housing, and each bearing has an oil sump, some small holes to allow the oil leaking from the front and rear of the bearing to trickle down into the sump, and a wool wick that uses capillary action to “pump” oil out of the sump and bring it back up onto the bearing surface. Here’s a picture that shows how it all works:
Wagner Fan - Front Bearing
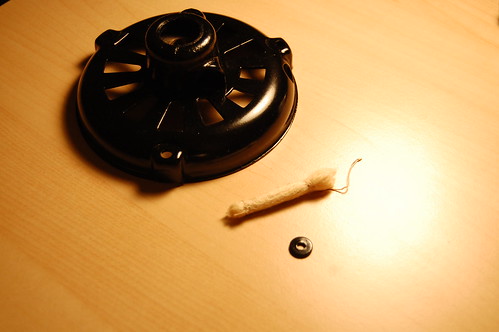
In the picture, the oil sump is the lump protruding from the bottom of the round bearing housing. You can see the small hole that allows oil to drain back into the sump. On the inside of the bearing, there is an ovoid hole that lets the wool wick contact the rotating shaft and apply oil sucked up from the sump. You can click on the picture to see the Flickr annotations. Here is what the wool wick looks like:
Wagner Fan - Wool Wick
The small round washer acts as a plug to keep the wool wick inside the bearing, and the hole is where you add oil. The wick itself is made of several strands of worsted wool yarn that have been tied with string. Originally this was a black lump of grease when I first pulled it out of the bearing, but I was able to clean it up by soaking it in laundry detergent. A greasy oil wick prevents it from working, and my Wagner’s front bearing was bone dry when I first took it apart. If you’re doing a restoration and you need to replace the wick, you must use real wool. Synthetic fibers apparently do not have same degree of capillary action. Wool wicking is also the material of choice for steam locomotive bearings.

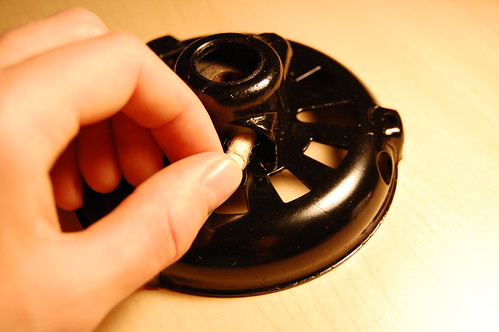
The wick fits in the hole on the top of the bearing.
Wagner Fan - Installing Wick
Here is a photo showing the assembled bearing (minus the washer).
Wagner Fan - Front Bearing with Wick
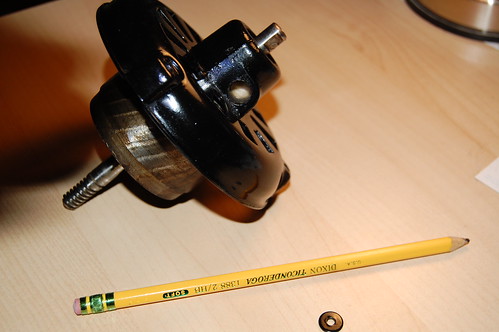
I used a pencil to pack the wick into the bearing. It is now ready for oiling. I am using the 3-in-1 SAE 20 oil that is meant specifically for motors. It does not smell so strongly as the multipurpose 3-in-1 oil. In this picture below, you can see the wick soaked with oil on the fan after final assembly:
Wagner Fan - Front Bearing
Add oil about 10 drops at a time and allow it to soak in for an hour. Do this again until the part of the wick you can see is saturated. If you add too much oil then it could spill out of the top, so you don’t want to add more oil than the wick can hold. It’s important to make sure the wick never goes dry so that your bearing will always be properly oiled.

A New Fan

Restoration 1 Comment

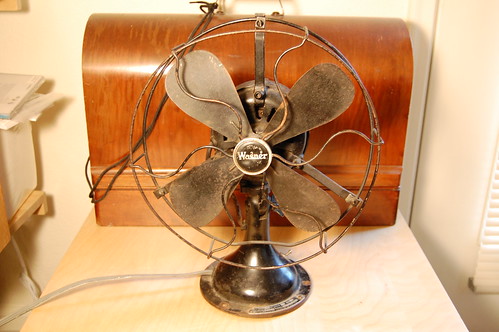
At the electronics flea market, I found another antique desk fan. This one is a Wagner 9″ oscillator, series M, model 5260, model L53A68. I am not certain when it was manufactured: my guess is the early 1940s.
Wagner Antique Fan
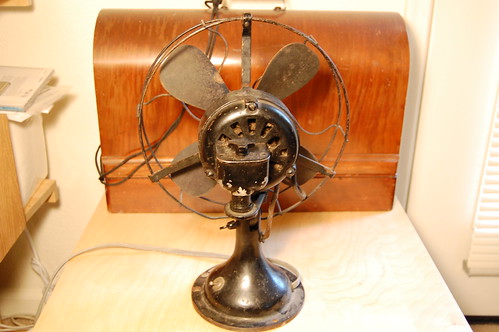
On the rear of the fan you can see the oscillator gearbox:
Wagner Antique Fan
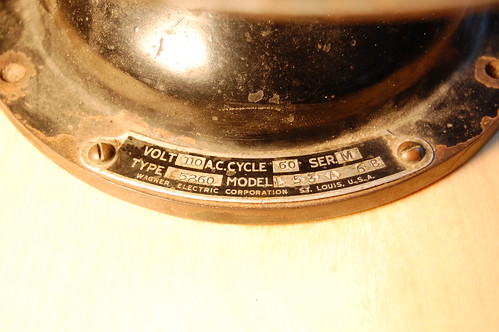
Here is a closeup of the fan’s nameplate. It has everything except for the date of manufacture.
Wagner Antique Fan
This fan is in reasonably good condition, compared to the Emerson that I restored before. There is very little rust which makes the restoration job much, much easier.

Emerson Fan Blade Removal

Restoration 15 Comments

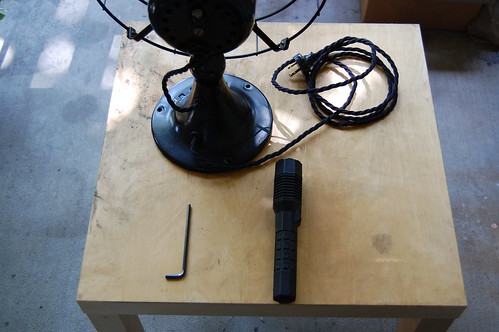
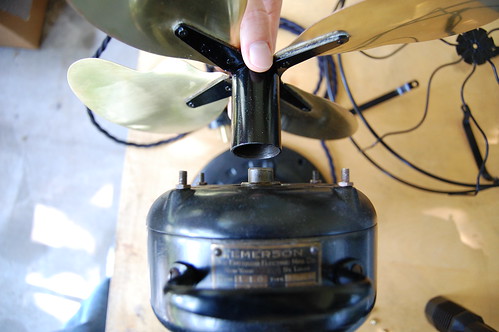
So you’ve obtained an antique desk fan, and you want clean it up and restore it, but you just can’t seem to figure out how to get the blades off. Based on a number of email inquiries, here are instructions for removing the blades from certain Emerson antique desk fans. You will need some basic tools, including an Allen wrench, a flashlight, and a wrench appropriate to removing the cage.
Emerson Blade Removal, Part 1
Before you begin, you’ll need to remove the cage so you have easy access to the fan blades. Usually that means you need to undo the four bolts holding the cage assembly to the front of the motor casing.
Next, you need to examine the rotor of your Emerson’s motor using a flashlight. Look for a “blind” hole drilled into the side of the rotor. These are drilled by the manufacturer to remove some metal and balance the motor.
Emerson Blade Removal, Part 2
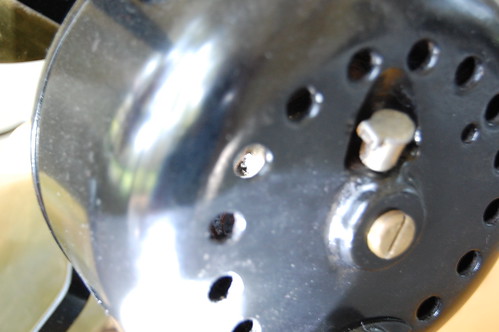
Once you’ve found the hole, insert the Allen wrench through one of the vent holes in the motor casing and into the balancing hole on the rotor.
Emerson Blade Removal, Part 3
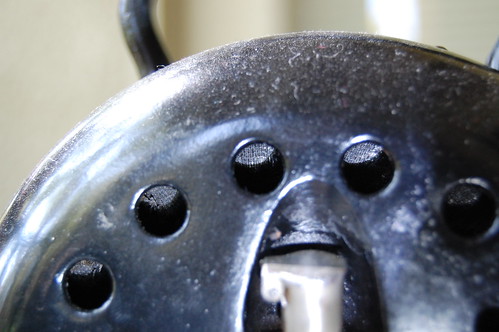
The next photo shows a closeup of the Allen wrench inserted into the balancing hole.
Emerson Blade Removal, Part 4
When you do this, be very careful not to damage any of the stator windings. They are very fragile and protected only with a layer of cloth tape.
Emerson Stator Windings
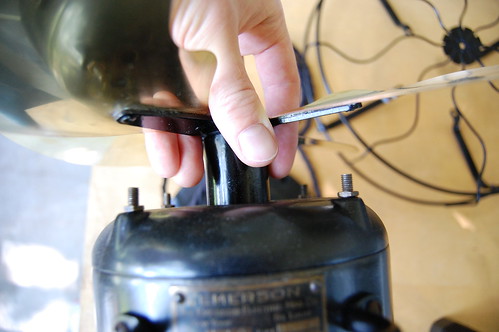
Once you’ve got the Allen wrench in position, grasp the fan blade by the blade hub (commonly called the “spider”). Yes, the blades will provide more leverage, but they bend pretty easily, and once you’ve bent a fan blade, it will never be the same again.
Emerson Blade Removal, Part 5
The threads fastening the wheel hub to the rotor are left-handed, so you need to spin the hub clockwise to unscrew it. The hub on my fan had frozen onto the rotor, and no amount of physical force would get it turning. I trickled some penetrating oil down the hub so it could get into the threads and free things up, but even after that I had to heat up the hub spindle with a heat gun. The heated metal expanded and broke the threads loose. It made a terrible squealing noise when I unscrewed it.
Emerson Blade Removal, Part 6
And the blades are off! You’ll want to clean up the threads at this point to remove any crud or rust, and add some oil to make it easy to remove the blades next time.

Emerson 28646 Restoration Details

Restoration 3 Comments

Restoring the antique fan also involved some safety upgrades. Along the way, I derived the schematic. The motor has three connecting wires, but the trick was to figure out how the wires connected to the motor windings.

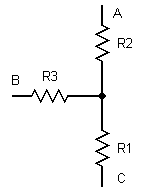
I measured the resistance between each wire, assigning the wires the arbitrary designators A, B, and C. The resistance between A and B is 53.3 ohms, B and C: 35.3 ohms, and A and C: 19.1 ohms. Assuming the star configuration shown in the figure below, it’s possible to calculate R1, R2, and R3 as follows. R1 + R2 = 19.1, R2 + R3 = 53.3, R1 + R3 = 35.3, therefore (solving for R1, R2, and R3 using substitution) R1 = 0.55 ohms, R2 = 18.55 ohms, and R3 = 34.75 ohms. Clearly R1 is just the center tap and R2 and R3 are motor windings.
Resistors
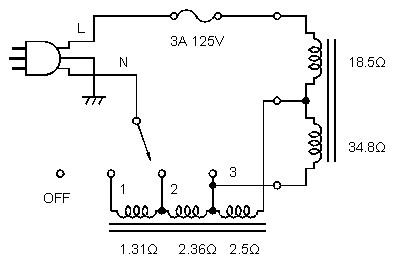
Based on this information and similar measurements performed on the speed coil, the schematic was reproduced as follows:
Emerson Schematic
This schematic shows two of the safety upgrades. First, I added a 3-prong AC cable and connected the metal chassis to the safety ground. Then, I added a fuse inline with the AC hot. The fuse serves two purposes: it prevents a fire if the motor windings short, and it also will blow if the AC hot shorts to the chassis.
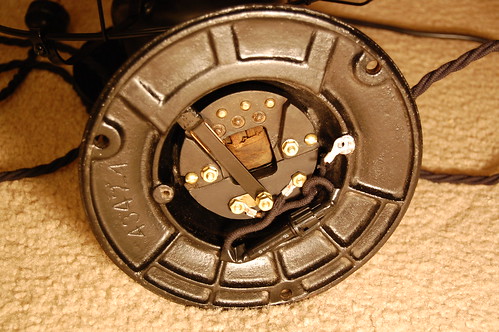
Here’s what the underside looks like without the cover. The switch contacts, the fuse, and part of the speed coil are all visible.
Emerson - Underside
The original speed selector switch lever was metal, which was not very safe because the lever was connected directly to AC hot. Only the plastic knob prevented a nasty shock. I fabricated a new lever out of FR-4 fiberglass sheet. The knob itself was originally molded onto the metal lever and I could not remove it, so I made a new one by casting a replacement out of epoxy.
Emerson - Switch

Antique Fan Restoration

Restoration 8 Comments

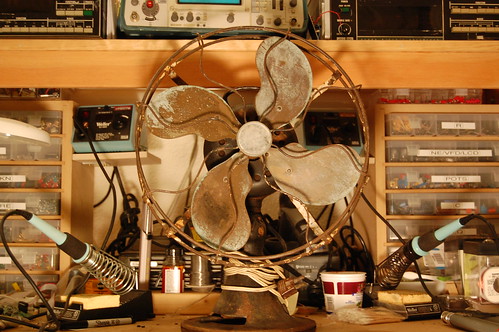
At the De Anza Electronics Flea Market, someone was selling a rather beat-up and rusty desk fan. But it was no ordinary desk fan, this one was quite old. I had to have it. Later on, it looked at me plaintively from my workbench.
Antique Fan
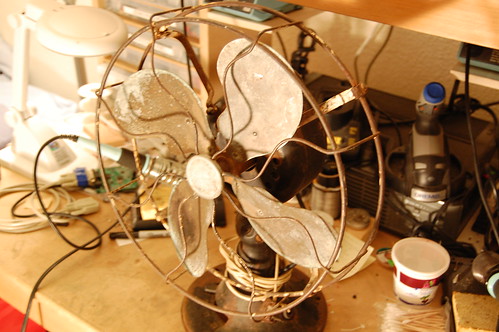
Suddenly it hit me–I had to restore this bedraggled-looking thing!
Antique Fan
It was a really long and involved process, taking me well over a month, but I have finally (mostly) finished. Why did it take so long? Well, for example, I found that the speed coil (basically a big inductor with taps for each speed setting) was slowly being eaten by rust. Thus began the arduous process of disassembling the entire coil, pulling apart the laminations, polishing off all the rust, varnishing them again (since the laminations must be insulated from each other), and reassembling the whole thing.
Emerson Laminations
All the work really did pay off. Here is what the mostly completed fan looks like. It’s fully operational. The cotton-covered twisted line cord I purchased from Sundial Wire. The plug is actually a standard item at OSH, believe it or not. I guess styles don’t really change much. The cord the fan came with was a more modern zip cord with a quick-plug, and the replacement plug is basically a 3-prong copy of the original.
Emerson Antique Desk Fan
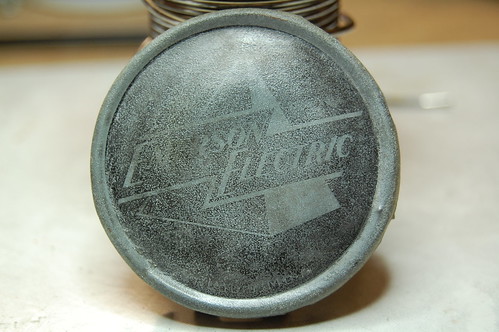
Why “mostly?” Well, the badge that goes in the center of the cage is pretty much beyond repair, and it also appears to be the wrong badge for this fan.
Emerson Nameplate

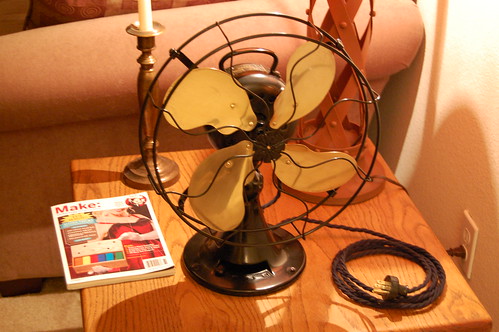
The badge should be brass with a slightly different logo. Regardless of whether or not this badge is original, brass would look a whole lot better. I have been trying (and failing at) various brass etching techniques, since I have the CAD drawing of the logo already.

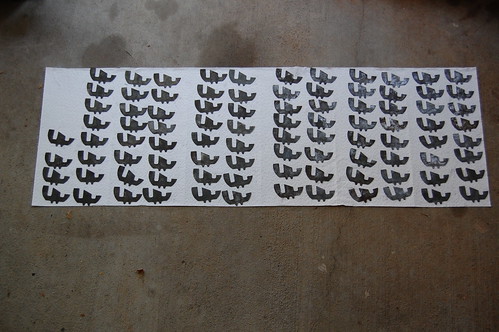
Problem #1 is getting the toner transfer method to work. I have used magazine paper (an old issue of Nuts and Volts: my Make magazine issues deserve better!) and it really does not work for me, probably due to the amount of toner my laser printer puts out. Trust me, I tried a dozen times or so.

Problem #2 is the actual etching process. Salt tank etching was a bit too faint, so next time I will try ferric chloride, which is usually used for PC boards, but should work for brass as well.

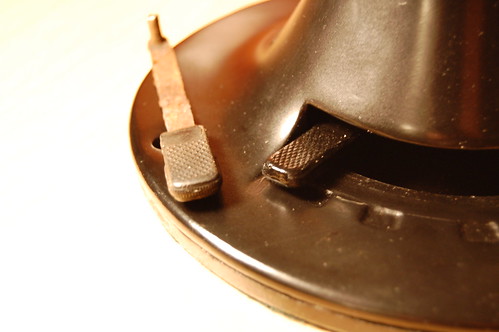
Problem #3 is getting the etched brass sheet into the proper shape, which is convex in the middle with a rounded rim. Metal tabs in the back fold around the disc in the center of the cage to hold the badge in place.

If you have any ideas, drop me a line in the comments…

Vintage Oscillograph Restoration

Restoration 1 Comment

Previously I posted about a vintage Clough-Brengle oscillograph I obtained. It’s been a long process, but I’ve restored it to operational condition.

One of the first steps in the process was to figure out what needed to be fixed. In electronics this old, the first thing I check are the capacitors. They were mostly paper capacitors which I just replace outright since they usually fail.

For this restoration project, I want to keep the vintage look as best as possible. One way is to dress up the new capacitors in the clothes of the old capacitors.

In this picture you can see the metal cans containing the old capacitors and the new ones soldered on top for testing purposes.
Recapping - Before
Here I have used pliers to bend the flange back and remove the “lid.” The stuff inside is a wax that insulates and holds the actual capacitor roll in place.
Recapping - Decapping
The easiest way to remove it was to put a big wood screw right in and pull it out with pliers.
Recapping - Removing Innards
Now you can see what the roll itself looks like. It’s actually Kraft paper (like a very thin version of grocery bag paper) that has been vacuum deposited with an aluminum film. Two sheets are rolled up together producing the capacitor. The Kraft paper is impregnated with oil to increase the dielectric strength.
Recapping - The Tootsie Roll from Hell
Here’s a larger one that I unrolled all across my workbench.
The Hapless Capacitor, Part II
Notice how much smaller the new capacitor is. This fits easily in the metal can that once contained the old capacitor.
Recapping - A Fresh Start
It was difficult to close the rolled metal lip without denting it, so it doesn’t quite look like the original, but it still beats ripping out the old capacitor or having the new capacitor squat on top like some sort of parasitic insect.
Recapping - Complete
After recapping everything, it was time to strip down the chassis and get rid of the rust. I got rid of most of it, although there was a lot of pitting and such left over. I used Naval Jelly which does a good job of converting the original iron oxide (ugly red rust that spreads like gangrene) to iron phosphate (which pretty much just sits there). The grommets had all hardened and were crumbling off, so I replaced those as well.
Oscillograph - Naked

Here’s a closeup of the back. You can see a few cardboard-roll style capacitors which have actually been gutted and fitted with shiny new capacitors on the inside. I sealed the ends using the old wax. Speaking of capacitors, I also had to replace two big electrolytic filter capacitors. The insides were filled with hardened pitch which I had to drill out to make room for the new capacitors, which were about 1/10th the size. Don’t you like the label?
Oscillograph - Vintage Electrolytic
This thing runs great now. I even dragged it out to the Maker Faire, but I didn’t plug it in for fear of wandering fingers (I left the cover off to expose the excellence inside).